How To Build A Bedini SSG Step One The Rotor
Learn how to build a Bedini SSG step by step. You can restore lead acid batteries at home using this simple device. The Bedini motor can be build using all recycled materials so it can be made for free.
If you missed out on the parts list, please go back and get everything here: How To Build A Bedini Motor The Parts List
Step One The Rotor
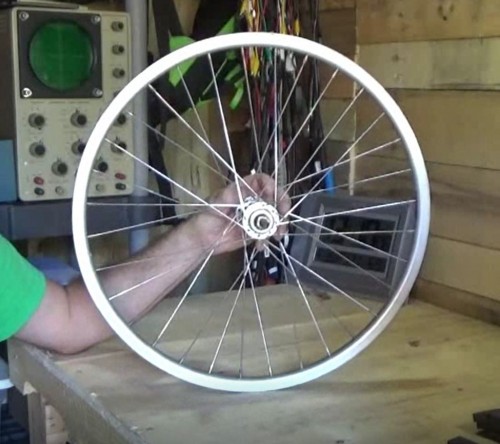
First we will examine the rotor and prepare it for building your Bedini SSG (Simplified School Girl) motor. The rotor can be just about anything that will spin freely with loose bearings.

Building a Bedini SSG (simplified school girl) motor - the rotor
Some people have used bicycle wheels, lawn mower wheels, roller skate wheels, computer hard drive or CD ROM drive motors and more. Just about anything with freely spinning bearings and a flywheel.

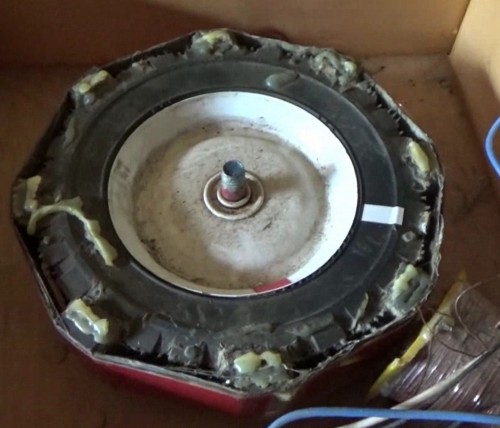
My old Bedini SSG rotor
A flywheel is a round mass which keeps a wheel spinning after the power stroke is finished.
A simple way to test your wheel is to just give it a spin. If it spins freely and easily and continues to spin a while, then you have a good start.
Prepare The Bearings
First you have to prepare the bearings of your Bedini SSG rotor. If you can remove the bearings, do so now. If not, dont stress there are ways to make this work.
If you have the bearings out, see if you can carefully pry off the dust cover to expose the bearing balls themselves. Again, dont stress if this is not possible for you. And try not to damage the bearings as you work.
Next, spray the bearings with carburetor cleaner to remove any grease. Do the best you can and turn the bearings over a few times, hitting both sides. Repeat until you are sure there is no more grease inside the bearings. You should feel a difference if you rotate the bearing in your fingers.
Now, spray the bearings with WD40 to remove any water. This step is optional and more important for used bicycle bearings rather than new ones. If your bearings are brand new then skip this step.
Next you will need some very fine lubricating oil such as sewing machine oil. Just put a few drops of oil in the bearings and spin them a bit to work the oil through.
You want a clean and very free spinning bearing for the rotor.
When finished, put the bearings back inside the wheel.
Balance The Wheel
The next step is to balance the wheel. You do not want any wobble in your wheel so it is best to balance it at this time. Any wobble will damage the bearings with time and reduce their life.
Hold the rotor in your hands in a verticle position and give it a gentle spin. Watch and see where the wheel stops spinning. Mark the bottom most point with a marker.
Now get some lead fishing weights for the next stop. The tiny little lead shot weights are perfect for this step.
Tape a little lead shot onto the wheel exactly opposie the mark you just made. This is the lighter side of the wheel. Now give the wheel a little spin again and see where it stops.
If the lead weight ends up on the bottom, then you have to use less weight, it is too heavy. If the marked spot on the wheels ends up on the bottom, then add more weight. Just add a tiny bit at a time until the wheel is balanced.
When the wheel ends up stopping at a random point three times in a row then you have finished balancing the rotor.
You can watch today's video here:  How To Build A Bedini Motor Step By Step ~ The Rotor
While you are over there please subscribe to my YouTube channel and follow our daily videos as we strive to become self sufficient and off the grid on a budget.
Feel free to ask any questions or get help with your project on our
Read the next article in the series: How To Build A Bedini SSG Step Two Label Magnet North Poles
About the Author
| Troy Reid |


