How To Install An Inverter In Your RV AC Converter Box
If you want to run your RV or camper on solar power then you will have to modify your original electrical control box. This box converts shore AC power from a camp ground into 12 volts DC to power your RV lighting and accessories. Most RV lights are 12 volts as are the heater blowers, controls and accessories in the RV.
To install an AC inverter in your original converter box requires a bit of modification to the box. You cannot simply plug in your inverter to the AC lines or wires in the RV and expect things to just work happily. The converter box takes in 120 volts AC shore power and converts it to 12 volts DC to power the DC lines in the RV. The control box also sends a charge to the battery bank in the RV. This is an unregulated charge and can ruin your batteries in a short time if left alone.
In most cases you need to remove the control box anyway in order to extend the life of you battery bank. Then you can install an aftermarket charge controller to maintain your batteries for longer life and reliability.
For off grid solar RVs you have to remove the 120 volt to 12 volt converter or disable it completely. This is a simple task and leaves the original AC lines and breakers and the DC fuses and wires in place.
First, make sure there is no power to the RV at all. Remove the shore power, shut down any generators and disconnect all batteries from the RV. You do not want any power going through the lines as you work or you could run the risk of electric shock, death or fire.

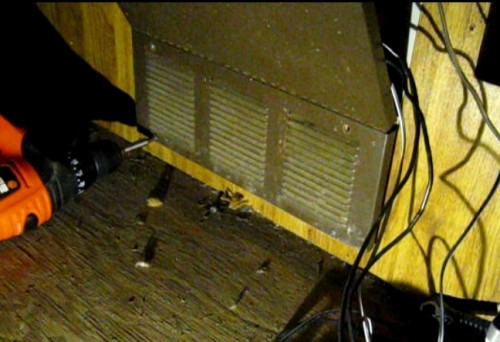
First you need to remove the four screws that hold the cover plate in place on the bottom of the control box as seen in the photo below.
Next you have to remove four more screws which hold the AC to DC converter circuitry in place. This is normally a slide out box inserted into the system.
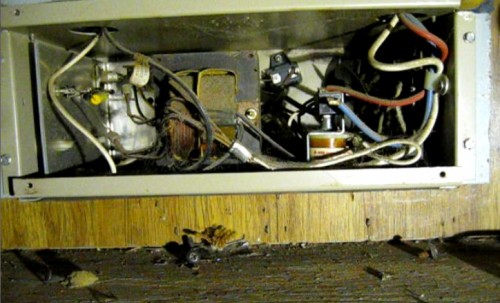
Now slide out the box a little bit and identify the five wires that you will have to remove. There are normally five wires in a converter box. There are two AC wires, white and black. There are three larger DC wires colored white, red and blue. Notice in the photo below the two wires in the left foreground. These are the white and black AC lines. Now notice the three fatter wires in the right foreground, near the top. These are the white, red and blue DC wires.
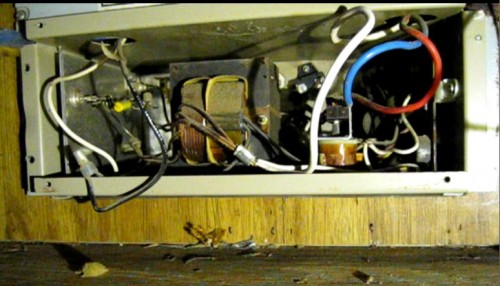
Note: Again, double check that there is no power running to the RV at all. Make sure the batteries and AC shore power are all disconnected. Also disconnect the vehicle starter battery.
Cut the five wires which go up through the top of the converter box and slide them out of the box. Now you should be able to remove the AC to DC converter box with ease. You can toss this out in the garbage or take it to the local recycling center based on your local laws. This will no longer be needed.
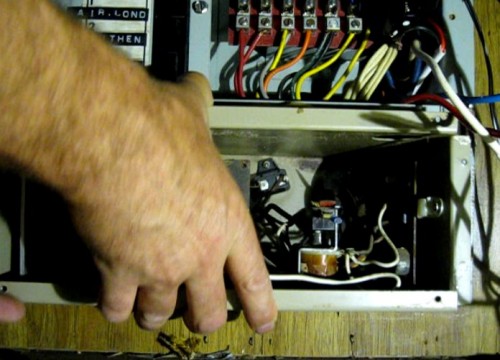

Your RV lighting and DC accessories at this point will no longer work. You must connect the red and the blue wires together in order to reconnect the DC circuitry in your RV. Solder them if you can. The next best thing is to use wire nuts and tape the wires for safety. Tuck them back inside the control box out of the way. You should tape off the end of the white wire and tuck it safely out of the way.
Also tape off the ends of the AC wires that you just cut and tuck them safely out of the way.
Now you will have to examine the top of your RV power control box. Up on top, or in the back there should be a wire that comes in from the RV shore power line. This is the huge thick black wire that you plug into the AC power at a campsite or sitting at home. Follow the wire along until it enters a junction box.
Open up the junction box and identify the three wires entering it. There should be a black, a white and a green or bare wire coming in. The green and bare copper wires are interchangeable and are the ground wires. The black wire is the AC hot wire and the white wire is AC neutral.
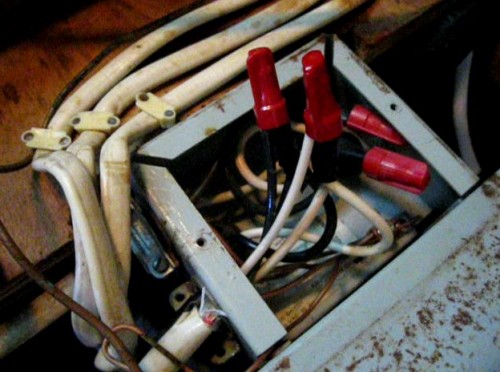
Normally the wires going into the control box are connected to the shore power lines with wire nuts.
Depending on how and where you set up your inverter, the next step will vary.
Your power inverter should be as close to the batteries as possible. Especially with larger wattage inverters you need to keep the inverter very close to the batteries and keep the wires short. Use the largest gauge wire possible. 2 or 4 gauge is recommended at a minimum.
Your inverter may also have either a standard AC plug outlet or three screw in terminals to connect it to your RV AC lines. Consult your inverter manual for proper installation procedure here.
Run an AC wire along your RV in a safe place between the inverter and the AC control box. It is best to run it along the walls or even inside the walls if at all possible. If not, then drilling through the RV floor and running the wire underneath the RV may be necessary. If you do this make sure you secure the wire safely to the RV frame and keep it away from moving parts. Use wire conduit where possible for added protection.
When you have the wires run through the RV now you can proceed with the connections.
Wire in the end next to the control box into the shore power junction box that you previously opened up. Use the original wire nuts to secure the wires in place. Make sure you keep black to black, white to white and green to green or copper. Tape the wires and wire nuts with electrical tape for added safety.
Now connect the other end of your AC wire to your power inverter. Again consult the inverter owners manual for proper installation.
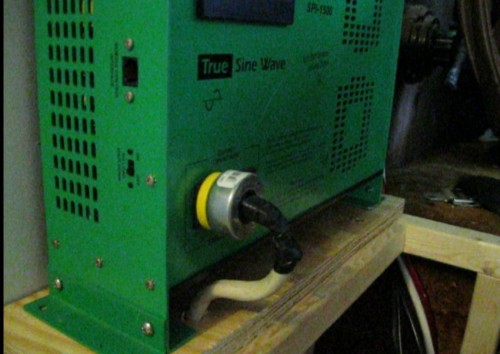
Now before applying power to your inverter make sure you double check all wiring in the control box. Make sure you have not left any wires exposed and that all connections are secure.
After inspection, you can connect power from the battery bank to your inverter and test out the AC wiring with a simple lamp plugged into a wall socket. If all of your wiring is correct you should now have AC in your RV.
Make sure that you close up all junction boxes and cover any exposed wires before running the RV.
Watch the full video here: How To Connect AC DC Converter Box To An Inverter
About the Author
| Troy Reid |


