How to make soap at home using all natural ingredients
Most people do not know it but the products we use every day for washing, bathing, laundry and house keeping contain a lot of harmful artificial ingredients. When you use soap for bathing, the chemicals in the soap are absorbed through your skin. By using all natural soap you avoid any dangerous synthetic chemicals.
Make your own soap at home and know what is in the product you are using. Old fashioned homemade soap was made using simple lye water and animal fat. The lye water came from running water reapeatedy through a bucket of wood ashes with a hole in the bottom. Eventually the concentration of lye was correct for soap making.
Making soap at home requires only three ingredients for a plain, simple bar of soap. Water, oil and lye. There is nothing else needed. No long, complicated ingredients list that requires a chemistry degree to pronounce.
Water.
Oil.
Lye.
 Homemade Soap Making Ingredients
Homemade soap is that simple. Your homemade soap can be used to wash your hair, body, clothing, dishes and anything else you want to clean.
You can, of course, add other ingredients to get more or less foam, smell nice, moisturize your skin and other effects. These are optional and should be left off for beginners. Once you are familiar with basic soap making then you can become more creative and add other ingredients to your homemade soap.
Bookmark this page and watch for future updates and recipes. They will be posted here.
How To Make Soap
To begin you will need a pyrex glass measuring cup, a wooden spoon, a kitchen scale, a candy thermometer, a piece of mailing envelope (or sheet of paper), rubber gloves, protective goggles, long sleeved shirt and pants, a deep sided pot or an electric skillet.
The ingredients again are simply water, oil and lye. You can get the lye at some hardware stores or online. Sometimes it is sold as drain opener. No matter, it should be 100% lye only.
This is a simple and basic recipe here. You can double or triple all of the ingredients for a larger batch later on.
Note: You may notice that I use a stick in the whole process instead of a wooden spoon. The reason for this is that the lye will eventually eat away at your wooden spoon and soften it. I got tired of eating up utensils and use a stick now. Just make sure it is not a poisonous variety of wood and carve the bark off first.
Basic Soap Recipe
16 Oz vegetable oil
7.5 Oz water
2 Oz lye
First, put on your protective eye goggles and rubber gloves. Lye is caustic and will melt your skin.
Measure out your water into a pyrex glass measuring cup first. Get your kitchen scale and place a cut out corner of a mailing envelope on top. This will be used to hold the lye when you measure it out. You can form a sort of holder using a plain sheet of paper as well.
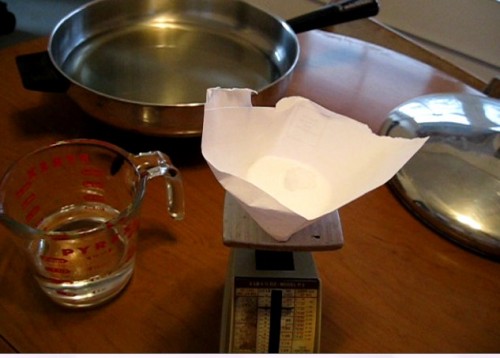 Measuring Out Lye Using A Paper Envelope
Measure two ounces of lye into the paper envelope.
Warning: Never pour water into lye. This could cause a violent explosion.
Pour the lye very slowly into the water while stirring. Pour a little bit at a time and keep stirring until all of the lye has been used up and mixed into the water. Be careful - the water will get HOT.
There is a chemical reaction with the lye and the water as the lye dissolves, so be careful not to touch the glass measuring cup.
Place a candy thermometer into the lye water mixture and put it aside until it reaches 100 degrees F.
Pour the oil into a pot or electric skillet. Some people also use a crock pot set on low. Heat the oil up to 100 degrees F.
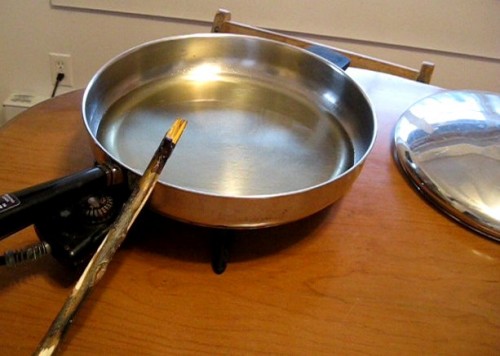 Soap Making - Heating The Oil
When both the lye and water mixture and oil are at 100 degrees, then slowly pour the lye mixture into the oil while stirring. Do this slowly to prevent spills. The lye could eat your table or counter top.
Now, just keep stirring. Continue stirring until the mixture gets thick. This could take anywhere from 15 minutes to an hour or longer. You should vigorously stir the mixture constantly the whole time.
Some people like to use an electric hand mixer to speed up the process. The process is called saponification when the lye and oil mix and are converted into soap.
Mixing and heating both speed up the process.
There are a few different phases you will see during the process.
First, you will start to see some little soap particles in the mixture. Next, there should be some foam starting to form at the top. Then the mixture should start to get thicker and look a bit like pumpkin soup.
Note: The color differences in the last couple photos is because the sun went down while I was still stirring the soap mixture. The actual soap did not change color much at all during the whole process. It just took a long time.
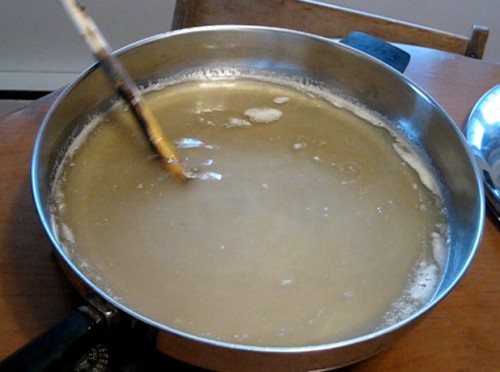 Soap Particles Starting To Form
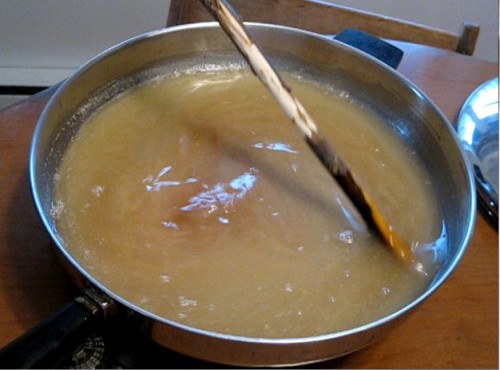
The Soap Mixture Gets Darker And Thickens A Bit
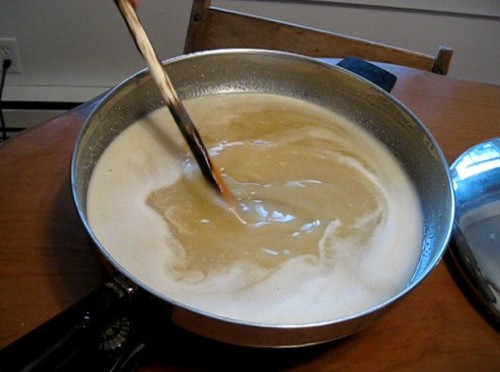
Foam Is Forming On Top Of The Lye And Oil Mixture
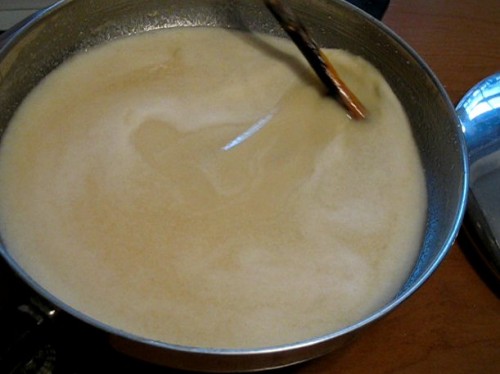
The Soap Mixture Is Getting Creamy Looking
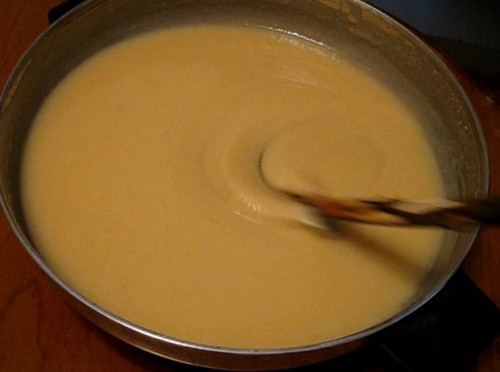
Homemade Soap Looks Like Applesauce Now
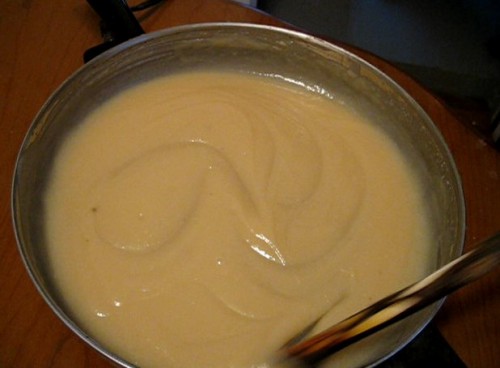
Final Soap Making Stage - Trace
After a while you should see an applesauce like consistency. This is when your soap is nearly finished. What you are looking for is called "trace". This is when you can pull out the mixing spoon and the soap forms a sludge at the end of the spoon instead of running off like a liquid. When a bit of soap forms on the spoon, then you have trace.
You will also notice that the soap mixture in the pot holds its form as you stir it. It has thickened and no longer flows like a liquid.
At this point, you can turn the heat off and pour your soap into a form. Silicon baking forms are perfect for this process because they can handle the heat and are flexible, which helps you remove the soap later on. Some people use special wooden soap forms, or candy forms.
Final Soap Making Process
Pour all of your soap into the form. Then scrape the pot clean and pat it down into the form. Your soap should be soft enough that you can get a smooth surface on top of the soap.
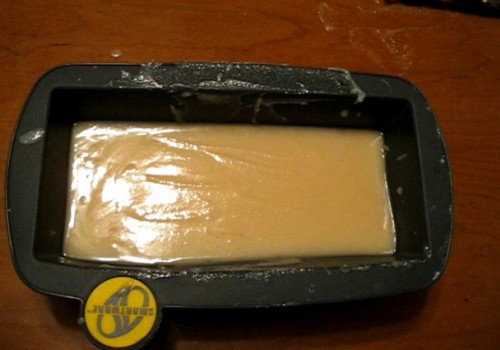 Pouring Homemade Soap Into A Form
Now, cover the form and wrap it up in a towel to keep the heat in. Leave it like this for 24 hours. After it has cooled and set overnight, you can remove the soap from the form.
Sometimes the soap is still too soft at this point. You can either leave it for a few days until it gets hard or you can place it in the fridge or freezer to harden it up enough to cut into soap bars.
You can cut up your soap into the shapes and sizes you prefer.
Now put the soap bars on a drying rack in a cool, dry place and leave it to cure for about 4 to 8 weeks. During this time the lye will continue to saponify (convert) the oil into soap.
Take The ZAP Test
To test if the soap is ready to use, simply take a tiny pinch of it in your fingers and touch it to your tongue. If you get a zap, like a 9 volt battery, then the soap is not yet cured. Do not fear this step. People have done this for hundreds of years with no ill effects.
If you do not get a zap, then the soap is ready to use.
Keep the soap stored in a cool, dry place. If you do not, the soap will absorb moisture and sweat. This will leave little brownish droplets on the outside of the soap. This is glycerin and totally harmless. You can still use the soap.
Watch a video of the whole process here: How to make soap video
Bookmark this page and watch for future updates and articles which will be listed below.
About the Author
| Troy Reid |


