
How To Build A Bedini Motor Series - Attach The Magnets
This is the next step in the How To Build A Bedini Motor Series - attaching the magnets to the rotor.
This step does not require a lot of instruction but it is a little bit time consuming if you want to make it look good.
If you missed the parts list or the first video in the series, please see them below:
How To Build A Bedini Motor Series ~ Parts List
How To Build A Bedini Motor Step By Step ~ The Rotor

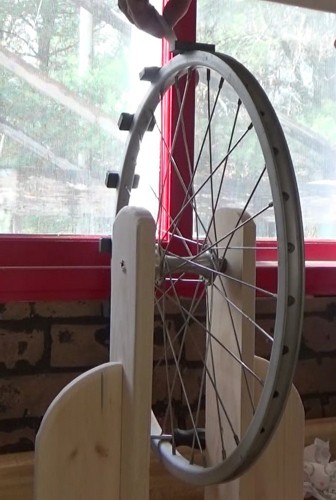
Bedini SSG bicycle wheel with magnets secured in place
The number of magnets you need for your rotor will depend on the rotor size that you chose for this project. I am going to use the bicycle wheel shown in the beginners handbook for building the Bedini SSG. You can adjust to fit your own needs as you follow along.
A very small wheel such as a roller skate wheel will take 4 magnets. A larger wheel like my lawn mower wheel can take up to 8 magnets. And the larger bicycle wheel will take about 16 magnets on average.
If you are jumping in late, please see the above links and follow the first steps before proceeding. This is a North pole magnet motor so all of the magnets should be placed with the North pole facing out.
On a bicycle wheel finding the exact position of a magnet is quite easy since the wheel has spokes. I use every second spoke to place a magnet. This gives me 16 magnets on an average bike wheel.
Start by jamming up the wheel from turning with a screw driver or pushing the wheel against a wall or something to hold it from spinning.
Choose a spoke and position a magnet on the wheel, centered over the spoke neatly with the North pole facing out. Then use a drop of super glue on each of the four corners where the magnet touches the rim of the bike wheel. The glue will wick under the magnet and form a good bond.
Rotate the wheel, skipping a spoke and put another magnet over the second spoke away from the first magnet. Again put the North pole of the magnet facing out and glue it in place.
Putting magnets on Bedini SSG rotor
Proceed until you have glued on all the magnets with all the North poles facing out.
Now this next step is optional but I prefer to have my magnets glued on well. I used a hot glue gun to better secure all the magnets to the rim of the bike wheel.
When I am finished with this step I use the hot glue to balance the bike wheel. This will take stress off of the wheel bearings and the frame of your Bedini Motor by reducing shake and wobble.

Putting Hot Glue On Magnets
And finally, use some fiber reinforced packing tape to further secure the magnets to the rim of your wheel. I run the tape round the entire wheel two full times, pulling tight and firmly to ensure the magnets never fall off. This packing tape is like extra security, keeping the magnets from flying off or hitting your coil.

Securing Bedini SSG magnets with fiber reinforced tape
Eventually one day you may get a little bit of a tapping sound if a magnet comes loose. The packing tape will keep it secure but you may want to glue it again just to avoid the annoying sound.
Now, I forgot to show this in the video, but if you have a magnet left you can test out the rotor to make sure that you have all North poles of the magnets facing out.
Take a magnet in your hand and hold it close to a magnet on the wheel. The magnet in your hand should have the North pole facing the magnet on the wheel. The magnets should repel one another and the rotor should spin.
You can actually have some fun with this while you wait for the next part of the series on how to build a Bedini motor.
You can watch today's video here:  How To Build A Bedini SSG Series ~ Attaching The Magnets
While you are over there please subscribe to my YouTube channel and follow our daily videos as we strive to become self sufficient and off the grid on a budget.
Feel free to ask any questions or get help with your project on our 
Read the next article in the series: How To Build A Bedini Motor Series - Wind The Coil
About the Author
| Troy Reid |


