
Began Assembly Of Quanta Magnetics Q3 Charge Accelerator Generator
Today I began assembling the Quanta Magnetics Q3 charge accelerator. I have been studying everything I could find about this device for about 12 hours now and I feel that I am ready to begin assembly.
Lou, a disabled man had purchased this a few years ago to put together with a friend but sadly it never happened. He invited us over the other day and we strarted a friendship which I believe is going to last.
When I got home that afternoon I spent the next six hours studying all the videos and anything else I could find from Quanta Magnetics. The next morning I studied even more until I am sure that I am comfortable with this device.
This is a three part motor/generator with a pulse motor, a generator and a toroid coil. It is similar to the Bedini motor I have worked with for so many years.
I first layed out the parts and the assembly manual. Then I went over all the pieces to be sure what went where.
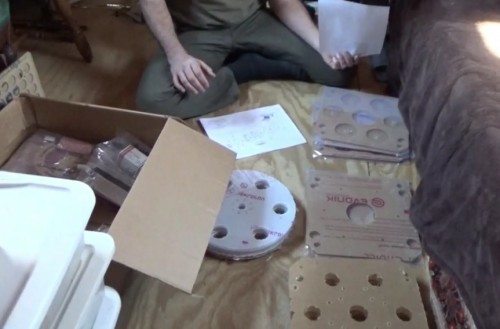
Beginning assembly of the Q3 charge accelerator
Next I started to sort through the coils. It is important to have all of your coils installed in the exact same manner. I located the start of the coil, which is the wire coming out of the middle of the spool. This will be considered down, or bottom, of the coil for my purposes.
Next I made sure that all the coils were wound in the same direction. Mine are all wound in a counter-clockwise direction. I took out six coils and made sure they all had the same orientation.
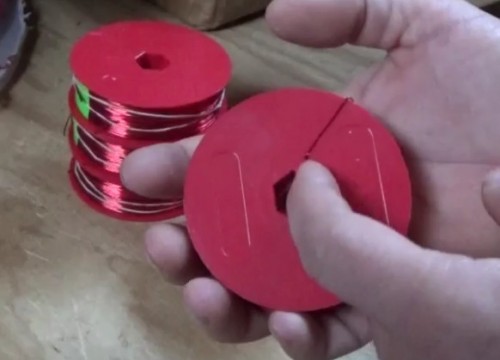
Locating the start wire of a coil and sorting coils
Next I put a coil into the stator assembly half with the supplied nylon nuts and bolts. The beginning wire of the coil - the one on the inside of the spool, went down into the indentation in the stator half. I figured this is the best way to assemble this so that if a wire ever came loose it would not be hit by a spinning magnet. All the wires will go through the stator half onto the other side.
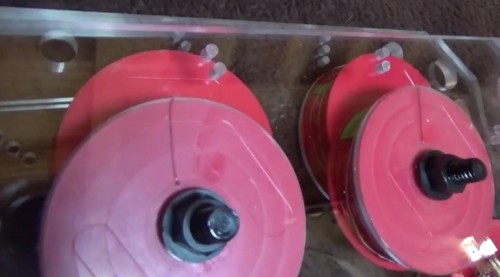
I mounted all six coils onto the stator half. Then I did the same for the next three stator halves. There will be a pulse motor and a generator, each having two stator halves.
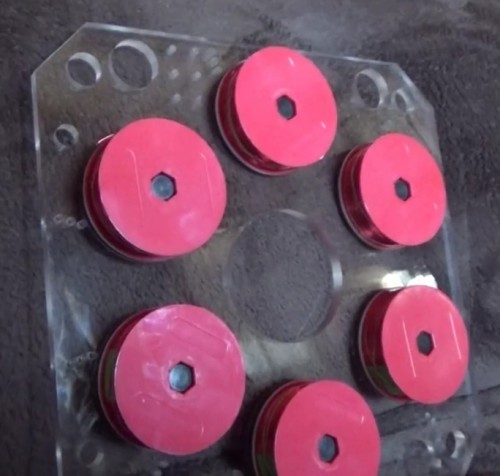
Coils mounted on stator half
Start wire of each coil inside the stator half
Next came the scary part for me. Working with the powerful N52 neo magnets. These are very powerful and can cause real harm to you or anything around you. But my biggest worry was the possibility of breaking a fifty dollar magnet. I want to get this device working and I cant wait to see what it can do.
I read the instructions for handling magnets from K & J magnetics website. I had to have help getting these apart because they were stuck together in two rows. This makes removing a single magnet very tough. But eventually I got a way to do it with a friend holding the stack of magnets on a work bench with all his strength while I pulled on a magnet with both hands until I got it free. When doing this the first time a magnet was pulled out of my hand from 18 inches away and flew back onto the stack. I was lucky nothing got broken.
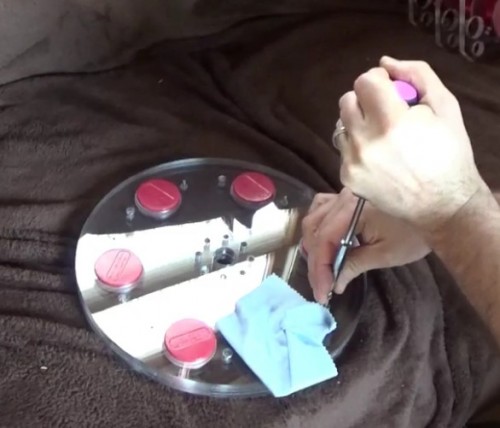
I brought in a magnet and used a compass to find the North pole of each magnet. The South indicator on a compass points to the North pole of a magnet according to K & J website. I put each magnet into a magnet retainer half lined with a one inch square piece of paper towel according to the assembly instructions. After putting both halves together I marked the North side of a magnet with a letter N and a permanent marker.

Identifying the North pole of a magnet using a compass
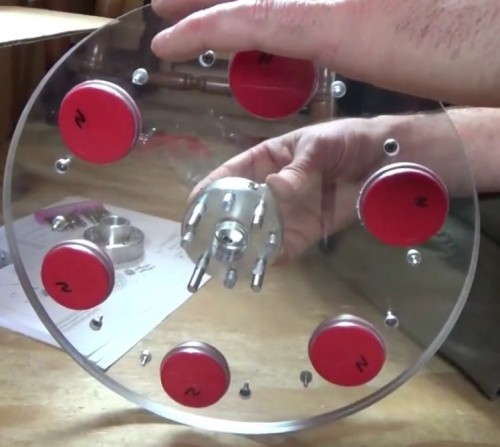
I carefully put each magnet into the rotor half with the North sides all facing upwards. It is important to have all the North sides of the magnets facing in the same direction.
Between identifying and placing each magnet I put a large pillow over the top of the rotor assembly to prevent the possibility of a magnet jumping out of place if bumped.
When I had all the magnets in place I next put the second rotor half down on top of the first and put in all the screws. I had to be careful when working with the screw driver because the strong magnets kept pulling the screwdriver in. This can break the magnets or scratch the beautiful polished acrylic.
Putting together the two generator rotor halves
Putting together the rotor hub assembly
Next I put together the hub assembly. This took me about an hour because of the magnets pulling the wrench into them and also the fact that the bolts were not threaded through far enough. I kept hitting the end of the threads before the bolts were tight. So I ended up using all of the supplied washers and split washers in order to get the bolts tightened down.
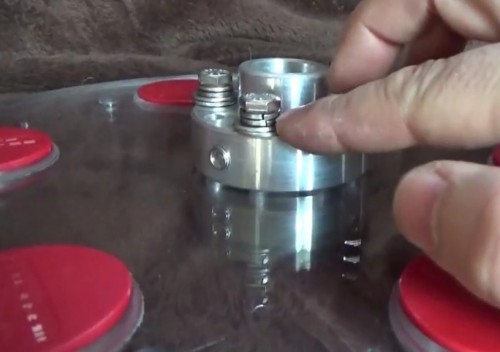
Generator rotor hub assembly finished
Keep checking back for further updates as I finish putting together this exciting motor/generator.
You can watch the video of today's work here: Started Assembly Of The Quanta Magnetics Q3 Charge Accelerator
While you are over there please subscribe to my YouTube channel and follow our daily videos as we strive to become self sufficient and off the grid on a budget.
About the Author
| Troy Reid |


