How To Make A Simple Solar Food Dehydrator
This is a very simple solar food dehydrator that uses the energy of the sun to dry food for long term storage. This solar dehydrator costs very little to make and can dry large batches of food in one to two days of full sun.
A solar food dryer is valuable in case of a power failure, disaster or just to save energy. All you need is a sunny day to preserve your food just like people did for thousands of years.
This passive solar food dehydrator costs very little to make. You can use dollar store cheese cloth and drop cloth for the coverings. The wood is very inexpensive and can be found at Lowes or Home Depot.
Here are the plans:
Materials Needed
First you will need the following lumber.
Qty 4 - 2x2x8 pine wood
Qty 8 - 1x2x8 pine wood
The boards cost about a dollar each.
You also need some drop cloth or other clear plastic large enough to cover the frame. The finished frame will be 5 feet high and about 7.5 feet around. Get a little extra plastic to make sure you have enough. The plastic should be transparent. At a minimum the front door must be fully transparent to allow the suns rays inside the dryer.
You can find cheese cloth at the dollar store to make the drying racks with. If you can find food grade plastic screen this is even better and lasts longer. Make sure it is also UV resistant.
You will also need some 1.5 inch long trim nails, some 3 inch long wood screws and some staples.
Tools Needed
You will need a wood saw, tape measure, hammer, screw driver and a staple gun.
Making The Solar Food Dehydrator
First cut the boards for the frame. You need to cut the 2x2x8 boards at 5 foot lengths. Put the 3 foot pieces aside for later.
You should have four side poles made of 2 inch by 2 inch by 5 feet high boards.
Now take the 1x2x8 boards and cut 18 pieces at 19 inches long for the side supports and shelf supports.
Nail one of the side rails across the top of two of your side poles and another just about 18 inches from the bottom.
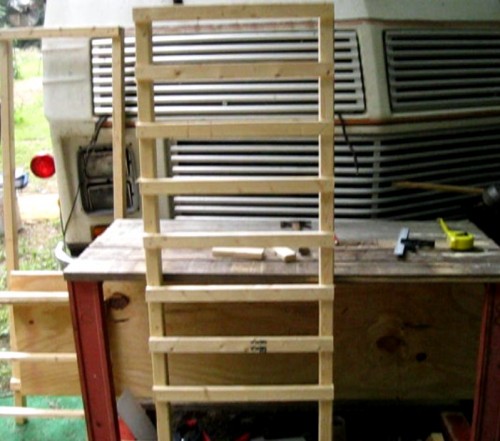
Now, starting from the top rail, measure 4 inches down and nail on another side rail. Then measure another 4 inches below that one and nail on another side rail. Continue until you have 7 side rails for the shelves plus the two frame supports you first put on. See the photo below. The top board is a frame support while the next seven boards will be for your food shelves. There is another frame support at the bottom, not seen in the photo.
Make two identical side frames.
Now cut 8 more pieces of the 1x2x8 boards at 28 3/8 inches length. These will be the front and back frame supports. Nail them together to the two side frames as seen in the photo below. Use 4 boards to attach the two side frames together as shown. Place one board under the top side rail and then space the others evenly as seen.
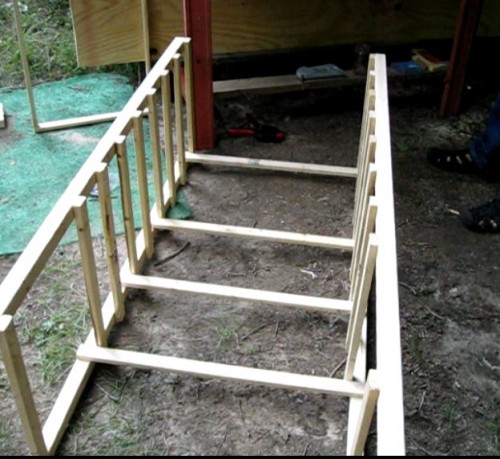
Use four more boards to secure the front of the dehydrator frame as shown below.
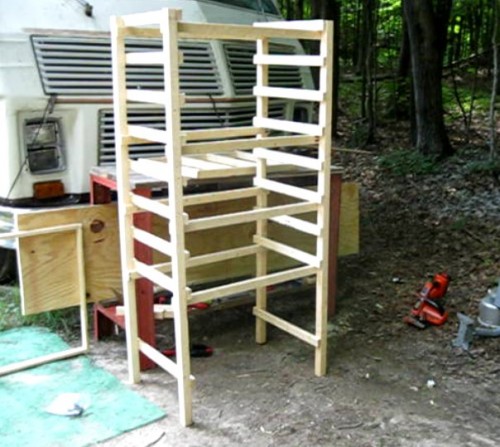
The finished frame of the solar food dehydrator is shown in the photo above.
Make The Solar Heater
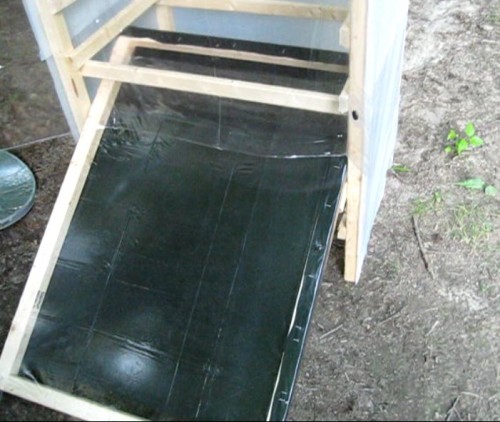
Take the remaining 3 foot long ends left over from the 2x2x8 foot boards and cut two of them 22 5/8 inches long. Use 3 inch long wood screws to fasten these on the inside edges of the longer 3 foot long boards as seen below. This is the frame for your solar heater. Make sure it slides inside the frame of the solar dryer as seen.
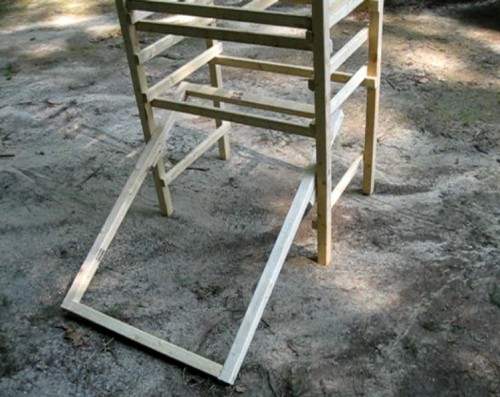
Use two of the smaller pieces of scrap wood left over and screw them onto the side of the frame as seen in the photo above. Prop the solar heater up with a board and try to get it to fit into the dryer frame at a 30 degree angle. Mark the side rails with a pencil to get the proper angle then screw the two small boards in place to make supports for the heater. This does not need to be precise, so I am sorry I have no exact measurements for this. I just eyed it up.
You want the heater to slide into the frame with the top centered and just underneath the bottom food rack. This will allow heated air to enter the food dryer and spread out and upwards into the solar dryer.
When making the dryer itself you can be flexible. You can use black gargabe bags or other plastic material for the heater. You can also use aluminum foil on cardboard for the bottom and paint it black. You can use foam with aluminum foil on top and then paint the foil black. The bottom of the heater must be some sort of heat absorbing black material.
Leave about two inches of open space at the bottom of the frame to allow fresh air to enter the heater.
Cover the top of the heater with clear plastic, glass or plexiglass. Leave the top two inches open to allow heated air to escape the heater and enter the food drying area.
Please proceed to Page 2 of the article to make the food drying racks
About the Author
| Troy Reid |


