How to make soap using the Hot Process for immediately usable soap
The hot process of making soap is the act of fully cooking the soap until the saponification process is completed. This means that all the lye has been used up converting the oil into soap. When soap is made using the hot process it will be immediately usable. Cold process soap on the other hand requires 4 - 8 weeks of curing before it can be used.
Before you decide wether you want to use the cold proces or the hot process of soap making, here are a few points.
Hot or Cold Process Soap
Cold process soap requires a long curing time of between 4 to 8 weeks before you can use it. But cold process soap is very easy to pour into molds and adding other ingredients such as milk, oatmeal or essential oils is much easier to control. Cold process soap making is very labor intensive and requires continuous stirring while the soap is cooking.
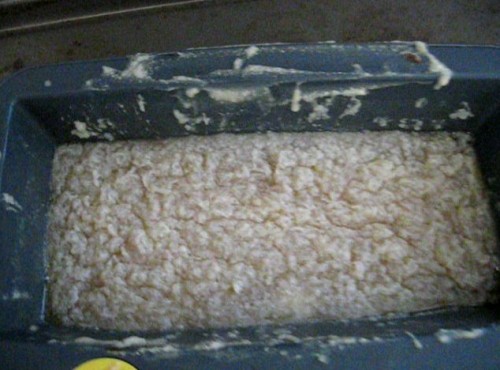
Hot process soap allows you to use the soap immediately after it has been cooked. Hot proces soap making only requires occasional stirring while it cooks. But hot process soap gives you a coarser bar of soap, usually with a rough, oatmeal like top on the block of soap. Hot process soap making requires precise timing in order to add essential oils before the soap hardens too much.
So each method has its pros and cons. You must decide which method is best for you.
Making Hot Process Soap
To make hot process soap, first follow the same prodedures for making cold process soap. Please see How to make cold process soap first. There you will find the recipe and all other important details about soap making. Follow the article up until you have mixed in the lye water with the heated oil. Then you can proceed with the following steps to make hot process soap.
After you have completed the first steps in soap making listed in the cold process soap article, you can proceed to cook out the soap until it is ready for immediate use.
For hot process soap making, you do not need to constantly stir the soap as it cooks in the pan like with the cold process soap. After mixing the lye and oil together, you can pour the liquid into a baking form and place it in a pre-heated oven set at 175 degrees.
Check on the soap every 15 minutes and stir it well. After about 30 minutes of cooking, take a tiny bit of the soap mix out with a wooden spoon and wait for it to cool. Then get some of the soap on your finger and touch it to your tongue. If it zaps like a 9 volt battery, then it needs to cook longer. The "ZAP" test is the easiest way to tell if the soap is done. When you no longer get a zap, then the saponification process is finished.
 Hot process soap making - looks like oatmeal when cooking
Continue checking on the soap and stirring every 15 minutes and testing for a zap.
Your soap may rise up almost looking like a loaf of bread sometimes while it cooks. This is not unusual, so do not be alarmed. Simply stir the soap well and put it back into the oven to finish cooking.
When there is no zap, then you can turn off the oven and allow the soap to cool. Leave the soap in the baking form overnight to harden.
Cutting Soap Bars
The next day, when the soap has hardened up some, it is ready for cutting. Sometimes the soap still has a lot of water in it and will be very soft. You can either leave it in the form for a few more days or until it firms up, or you can place it in the freezer for a few minutes to harden it up for cutting.
Get a cutting board and large knife. If you have a flexible sided form or a professional soap making form, then removal of the soap from the form will be easier.
If you have a professional soap form, the please follow the manufacturers instructions for removal of the soap block from the form.
With a flexible form, just pull outwards on the sides of the form to loosen the soap from the form. Then turn the form upside down and push gently on the bottom of the form until the whole block of soap falls out.
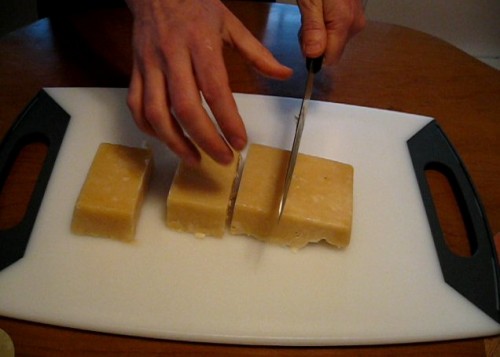
Now you can cut the soap into bars. You can cut and shape the soap any way you please. Some just cut it into blocks and use it like that. Some people get fancy and trim off the edges and corners to make nice, professional looking bars of soap.
 Cutting bars of homemade soap
If your soap is still soft, allow it to cure for a few days until it hardens up. A harder soap bar will last longer. Either way, your soap is ready for immediate use if needed.
You can get fancy and decorate your soap with packaging and give it to friends as gifts or sell it for a profit.
Homemade soap is all natural and healthier for your skin than commercial soap with artificial additives.
You can also add scents and other additives to your soap, but that will be a future article. Check back and the link to other fancy soap recipes will be posted here soon.
About the Author
| Troy Reid |


