How to grind the valves on your engine
How To Grind Engine Valves
Grind The Valves On Your Engine Yourself
With time, especially on older vehicles without hardened valve seats, your valves and seats will slowly become pitted and worn. Your vehicle will start to loose power and burn more fuel. Especially if you do not run lead substitute in your gas on antique vehicles, the valves will become pitted and burnt. You will get small micro-welds between your valves and valve seats with each opening and closing of the valves.
This article will show you how to grind your valves yourself on a budget. This was done first hand on a 1961 Ford Falcon with a straight 6 engine. But the instructions shown here are valid for any vehicle.
Besides the tools for removing the heads on your vehicle, the only things you will need are a valve spring compressor, a variable speed power drill and either valve grinding compound or turtle wax grinding compound and polishing compound.
You will also need a new vehicle head gasket set including the head gasket and valve cover gasket. You will need new valve stem seals as well.
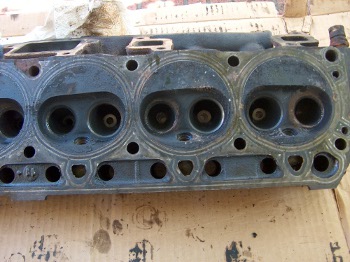
Old engine head showing pitted valve seats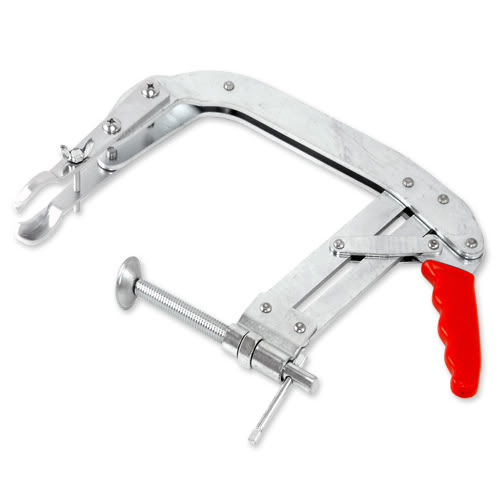
Valve Spring Compressor
Because every vehicle is different, it will be out of the scope of this article to show how to remove the heads for every single vehicle. But the general layout of most engines is the same. The vehicle shown in this example has one, single head. Yours may have two. The procedure is the same for one or two cylinder heads.
First you will need to drain your radiator. Most radiators have a drain valve on the bottom somewhere and you can drain the antifreeze into a large bucket to save for later. If you do not have a drain valve on your radiator, you will need to remove the lower radiator hose from the bottom of the radiator. Simply use a long handle screwdriver and loosen the hose clamp holding it in place. Carefully and slowly pry the hose off the radiator until fluid starts to run out. To avoid a mess, do not fully remove the hose until the fluid starts to run slower.

My old Ford Falcon
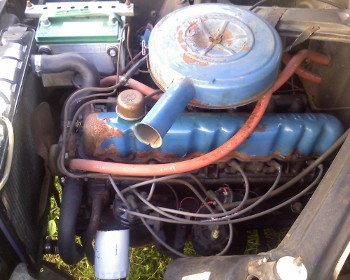
Ford Falcon engine
Remove your air filter and carburetor (if your car has one). If your vehicle is fuel injected, you will need to remove the injector rails. Refer to your vehicle service manual for help if needed here.
Remove all of your spark plugs and mark each plug wire with a piece of masking tape and a permanent marker so you remember where each one goes when you put them back in later. There may also be a few vacuum hoses or wires you need to move out of the way in order to remove the valve cover and cyclinder head.
You will need to remove your vehicle intake manifold and exhaust manifold. The exhaust will simply hang in place after you remove the bolts. Be very careful when removing exhaust bolts as they often break, expecially if they are very old. It is highly recommended to use brand new bolts when putting everything back together in order to prevent breakage.
Next, you will need to remove your valve covers in order to get to the head bolts and valves. With the valve cover off, you should see the valves on top of your engine head. There is a usually a large bar running across the head from one end to the other, holding the valve rocker arms in place. There are a few bolts holding this bar down. Remove the bolts and remember where each one goes to simplify re-assembly.
Now you can lift off the rocker arms from the cylinder head. Next, remove all of the head bolts, that hold the head to the engine block.
When you have everything out of the way and all of the head bolts removed, you can lift the head off of the engine block. You can see in the photo below that the head has been removed. Cover your engine at this time to keep dirt and debris from falling into your engine.
Use your valve spring compressor to remove the valves from the cylinder head. Refer to the instructions that came with your particular valve spring compressor for details how to do this. Generally you simply compress the valve springs and then slip off the retaining clips from the end of the valve stem. Then you can release the pressure from the valve spring and the valve will slide out of the head. On the photo below, you can see that one valve spring and valve has already been removed from the head.
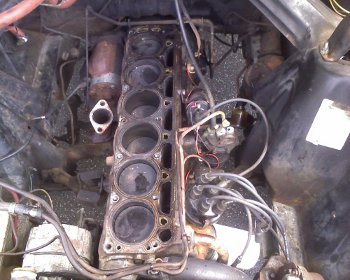
Engine with cylinder head removed

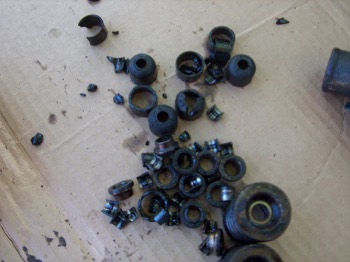
Close up of valve springs and old seals
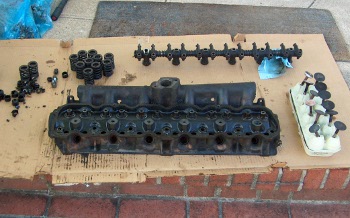
Refer to the photos below. Notice the egg carton holding the valves in order. Make sure that you keep track of which valve goes where when you remove them. An egg carton works perfectly for this task. Poke a hole in the carton and insert each valve in place to keep them in order. When you re-assemble the engine, the valves need to go into the same spot they came from.
In the first photo below, you can see the old valve stem seals and the valve spring retainers. On this old vehicle the seals were hardened and broken into pieces. Some pieces were laying on top of the cylinder head. The old valve stem seals can be thrown away. Keep the retaining pins in order to put the valves back later.
Notice in the second photo below that everything is neatly organized on a large piece of cardboard. Keep track of each piece as you take the head apart to ensure that you put everything back in the same place. The valves and valve seats will be worn together and in order to seat them again, they need to go back in the same position later.
Broken up old valve stem seals and retainers
Engine cylinder head fully dismantled
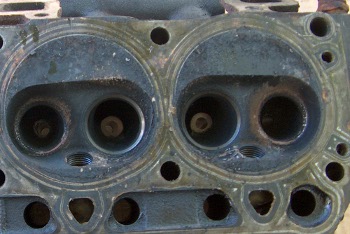
Below you can see the vehicle head totally stripped down. It is hard to see in the photo, but this old head was very badly worn. You can see the rust and wear on the valve seats. They should be shiny and polished looking. On this vehicle which was over 50 years old, the seats are pitted and worn badly. The engine had no power and was running roughly. It is amazing it ran at all.
Worn valve seats in cylinder head
Close up of pitted and rusty valve seats
Below you can see close up photos of the exhaust valves. The exhaust valves usually wear more due to extreme heat and stress. These are very pitted and rusty. In this case, it is usually better to replace the valves with brand new valves. You should also get hardened seats installed on antique engines in order to allow the use of normal modern lead free fuel. The vehicle shown here had been run for years with no lead substitute so the valves were very bad.
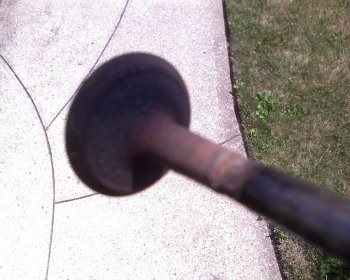
Rusty old valve before polishing
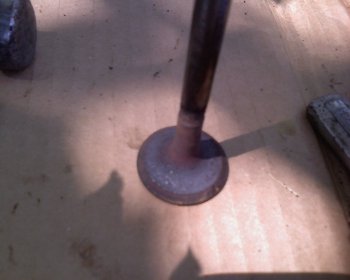
Old valve before grinding
Now, on to the valve grinding. Depending on the extent of wear on your particular valves and valve seats, you may or may not need to use course grinding compound. If your valves and seats are not worn badly, just use fine polishing compound. If your valves are worn very badly, as these were, use course valve grinding compound. If you do not have any on hand, you may use turtle wax grinding compound and polishing compound to grind your valve seats.
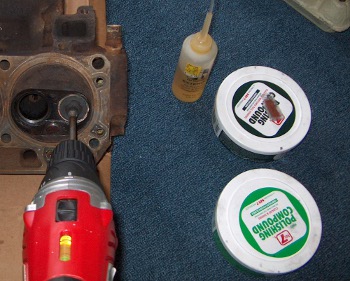
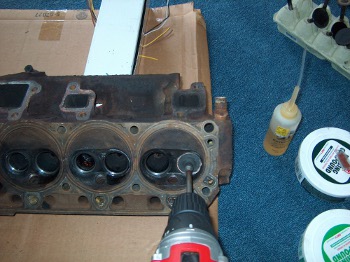
Using a power drill to polish valve seats
Grinding valve seats
Refer to the images above. Put some moistened valve grinding compound (or turtle wax) on the valve seat. Smear it around the ring of the seat. Then push the corresponding valve into the seat. Take your variable speed drill with a suction cup attached to the end. Wet the end of the suction cup so it holds better to the valve. You may need to clean the top surface of the valve in order to get a good suction. Spin the drill slowly to grind the valve in its seat. Work the drill in both directions, both forward and backwards. Slowly slide the valve in and out of its seat to move around the grinding compound.
You will notice that after a few minutes, the valve spins with less resistance. The grinding compound will be worn down. Clean out the valve seat and the valve and use fresh grinding compound and repeat the whole process. Do this repeatedly until both the valve edge and the valve seat are shiny and all the pits are gone.
Now change to the polishing (or valve finishing) compound and polish the valve to a shiny new surface.
When both the valve and its seat are polished, clean up everything and move on to the next valve. Repeat the whole process until you have ground all of your valves.
At this point a professional company would now grind off the end of the valve stem a tiny bit, precisely in order to prevent valve clatter later when the engine is running. By grinding the valves and seats, you are removing metal. The valves will now sit a little deeper into the seats and the valve stem will stick up higher than originally. This puts more pressure on the valve rockers and makes some noise. Unless you have a way to precisely measure the valve stem height both before and after grinding, you will just need to adjust the rockers later on.
If you use brand new valves, you will still need to grind the valves and seats to ensure a proper seat. The rockers will need to be adjusted anyway.
Clean the engine head and valves thoroughly. You do not want to have any grinding paste left on the engine head. You can use a wet rag and water to clean up the engine head to remove the grinding compound. Then coat everything lightly with a bit of oil to prevent rust.
Assemble your head in the reverse of the way you took it all apart. Put the valves back into their proper seats, using new valve stem seals. Put the head back on the engine and attach everything but the valve covers.
Refer to your vehicle service manual for the next step. You will need to adjust your rockers with the valve covers off and the engine running. This will be messy because oil will be running out of the head. Have some rags on hand. Again, according to your service manual, adjust the rockers to stop the clattering noise that should now be coming from then. You need to get the valve lash properly adjusted.
Now clean up the head especially where the valve cover gasket seat is. Use degreaser or dish soap to clean the valve cover gasket seat well. Clean the valve cover as well. Put everything back together.
Your engine will show a very noticable improvement in power and fuel economy now.
Enjoy!
Feel free to ask any questions or get help with your project on our
About the Author
| Troy Reid |

