How To Make A Rocket Stove For Free Using Household Items
How To Make A Rocket Stove
The Do It Yourself Rocket Stove Project.

Step by step instructions how to make your own rocket stove.
Rocket stoves, or wood gas stoves, are nothing new. But there are many ideas and plans out there. It can be confusing when trying to decide which version to make. We decided to make a simple rocket stove using common materials - soup cans.
A wood gas stove has an insulated burning chamber that is meant to super heat the burning wood, which releases flammable wood gas. Then the wood gas is burned as well. This double burn gives us much more heat from our fuel. Most common fireplaces in homes today just allow the wood gas to go out the chimney, unburnt. There are newer, more efficient models being manufactured that make use of the wood gas concept and give off a lot more heat while using less fuel than a common fireplace.
A rocket stove is made in such a way that there is a flow of air under the burning wood. This allows the wood to burn hotter and better. By insulating the burning chamber, we are raising the internal temperatures, and combustion of the wood gas follows.
Our project uses a coffee can and some soup cans to make the stove. For insulation, we used cat litter. The normal, cheap clay version with no additives. This makes a good insulator and can be found at a low price.
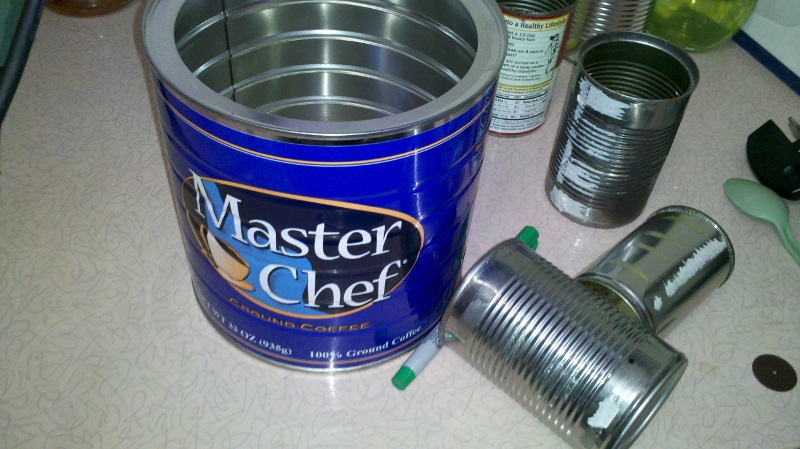
Materials needed to make a rocket stove
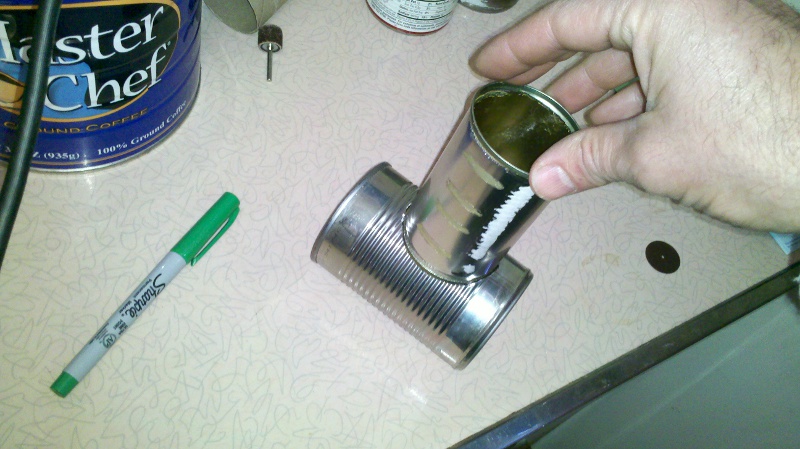
Mark the cans for cutting

Rocket Stove Burning Chamber Finished
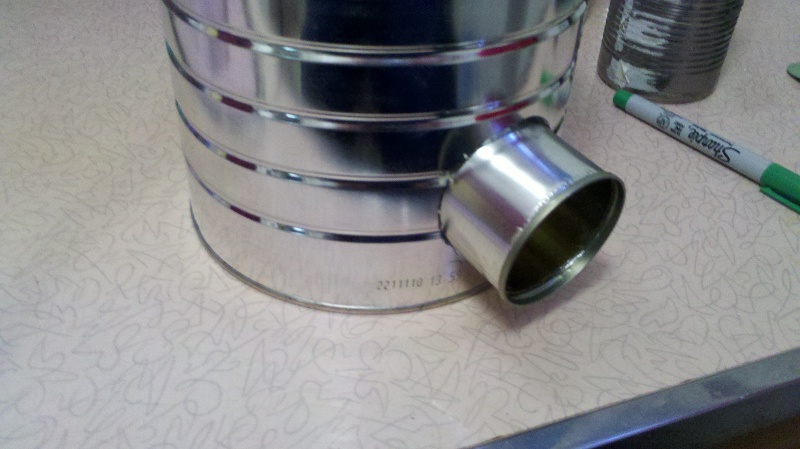
Side view of burning chamber
In the photos above you can follow the process of making your own wood gas stove. The first photo shows the materials needed. A 2.5 pound coffee can will be used for the outside chamber. Two 12 ounce soup cans make the inside burning chamber and chimney. We had an 8 ounce can on hand and used that for the feed chute, but you can also use another 12 ounce can for this.
First, take two of your 12 ounce cans. Cut both the top and bottom off one can and leave the bottom on one of the cans. The one with the bottom will be the burning chamber. The can with both ends removed will be the feed chute. Now use a permanent marker to draw the outline of the feed chute can on the side of the burning chamber can. See the second photo. We used a dremel tool to make nice, even cuts. But you can use tin snips as well. A hole drilled into the can first makes it easier to get the tin snips started. Make sure the one can fits into the side of the other one snugly.
Now take your coffee can (leave the bottom on) and make a hole in the side of it as well. Make sure that you measure the height of the cans. The 12 ounce soup can with a hole in it (the burning chamber) should sit on the bottom of the coffee can. The second 12 ounce soup can (feed chute) will pass through the side of the coffee can and into the side of the burning chamber can as shown in the third and fourth photos.
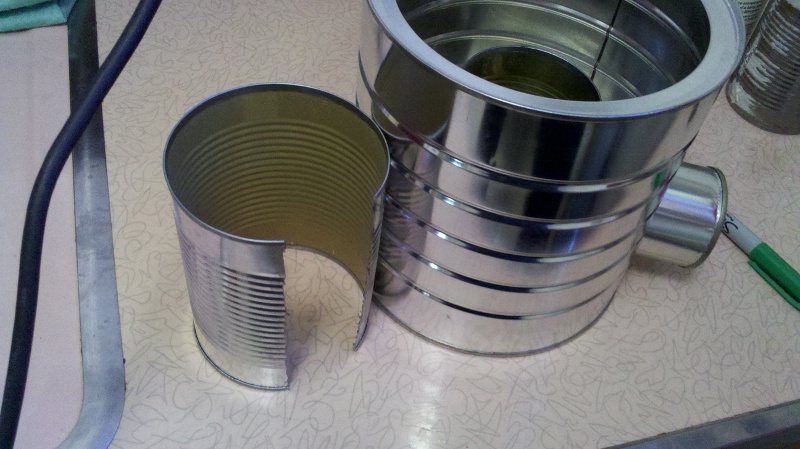
Making the Stove Chimney
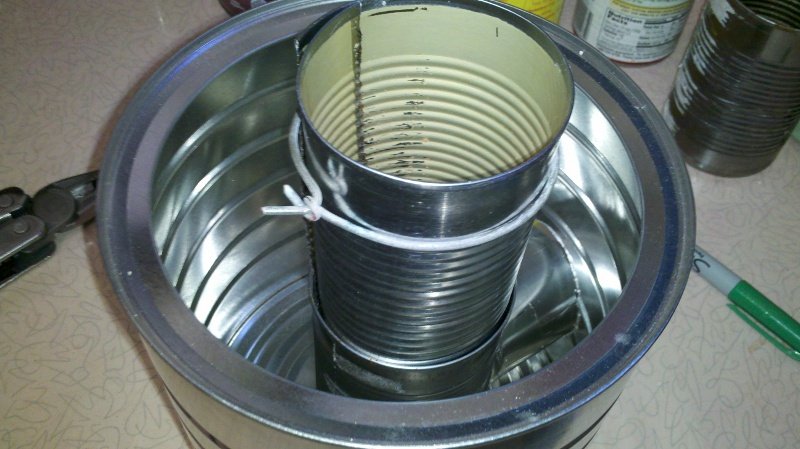
Secure the top can to the rocket stove
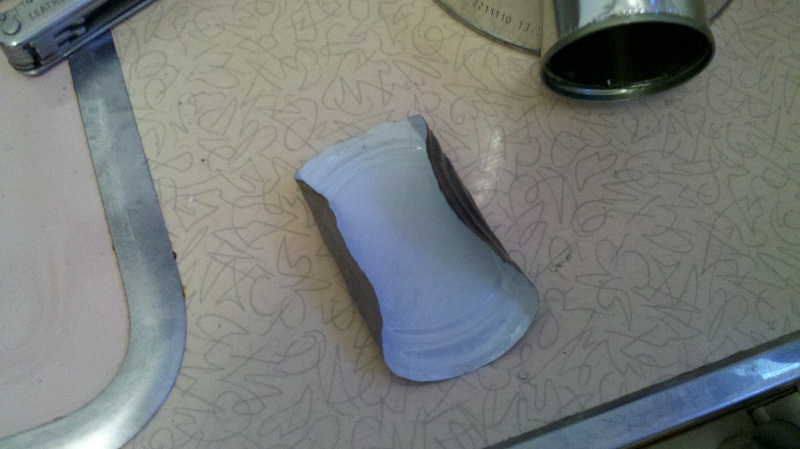
Forming the stove feed tray
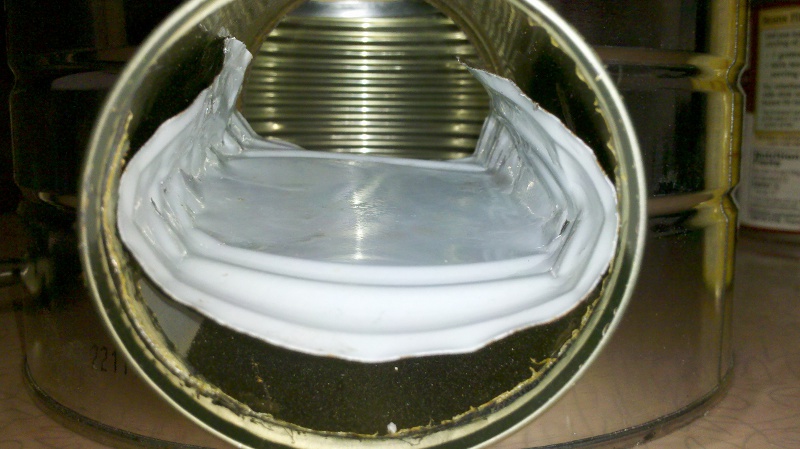
View of the stove feed tray
Take a third soup can and cut off both ends of it. Then split it right down the middle as shown in the first photo above. Stuff it into the burning chamber can just about a half inch deep and tie the top off with a piece of wire as seen in the second photo. The wire helps the can keep its shape.
Now take the lid off a larger can or a piece of scrap tin and form a bit of a ledge as shown in the third photo. This piece should fit into the feed chute can to make a ledge to feed the wood onto and allow air to flow underneath it. Make the ledge about two thirds down from the top of the chamber. See the fourth photo.
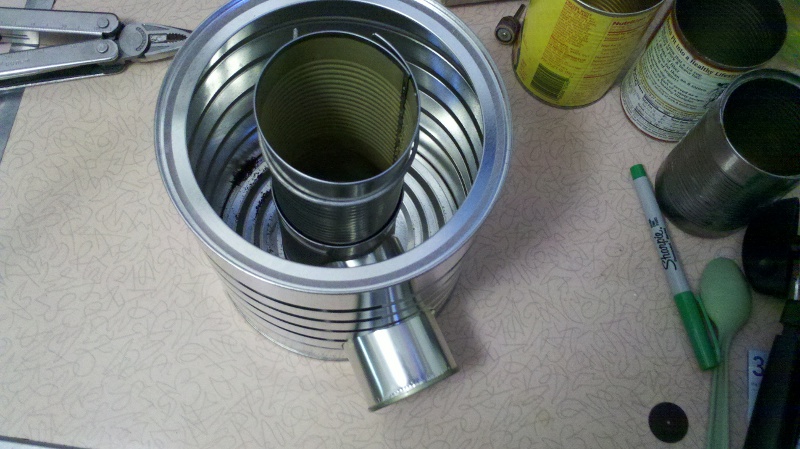
Fully Assembled Rocket Stove
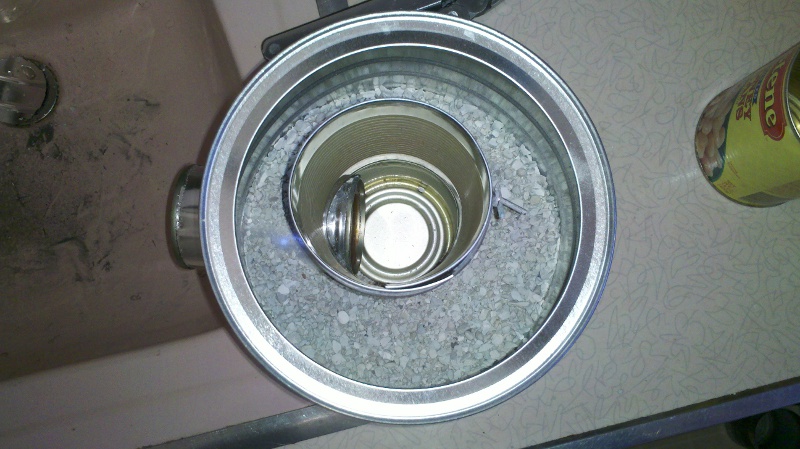
Filling the wood gas stove with insulation

Completed Rocket Stove Burn Test

Firing up the new rocket stove
Your rocket stove should look like the first photo above. Fill the coffee can up to the top with cat litter. Do this slowly and shake the can gently as you go to make sure all spaces are filled with cat litter. You can use other non flammable insulating material as well, if cat litter is not available.
The last two photos show the homemade wood gas stove burning.
When you first fire up your new homemade rocket stove, do so outside. The tin cans normally have some kind of coating on them which will burn off and emit poisonous fumes. Make sure you burn this off well and keep your face away to avoid breathing any fumes.
To light your new rocket stove, put some fine kindling such as leaves and small twigs into the burning chamber from the top. You can use a piece of paper or a twig to ignite the stove. Light the twig on fire and insert it into the burning chamger through the side ledge. The fuel should ignite rapidly due to the air flow underneath it.
This stove will smoke at first, until the burning chamber heats up and the wood gas is burning. After a couple minutes you will see that the fire changes in appearance. It will burn hotter and be nearly smoke free. After about 5 minutes the side of the can will get warm. After about 15 minutes, the can will be hot to touch. Make sure that your rocket stove is placed on a non flammable surface that can take the heat.
We made our stove as a heat source. It emits heat as long as an hour after the fuel has been consumed and the fire is out. You can cook or boil water on it as well. These stoves are very efficient and only need a small handful of sticks to boil a quart of water in about 15 minutes.
Below is a video showing our first rocket stove burn
 Homemade Rocket Stove Burning Test. Using My DIY Rocket Stove
While you are over there please subscribe to my YouTube channel and follow our daily videos as we strive to become self sufficient and off the grid on a budget.
Feel free to ask any questions or get help with your project on our
Note: Working with fire can be dangerous. Please use extreme caution when working with open flames. Do not use your stove indoors or near flammable materials.
About the Author
| Troy Reid |


