Repairing Water Damaged Truck Camper
This is some work I did a few months ago, but I took a lot of photos and wanted to share it anyway. The slide in truck camper is my first ever camper and when I got it, the guy told me it had no water leaks and everything was good. Not.
Right after I got it home, we had a hurricane. Then another one a week later. The camper leaked everywhere. I had leaks all over the place. And where he had told me it was old water damage and did not leak anymore was leaking the worst. There was water running in by the back wall of the above cab bedroom area. The wood and insulation were soaked.
I had never had any experience with repairing a camper before, so I was a bit afraid to start ripping things apart. But it had to be done. I had mold starting to grow. So one day I just tore out the whole bed floor and part of the back wall behind it. Then I had to let it dry out for a couple weeks with a fan running on it. I had a 12 volt fan running off a battery which was being charged during the day by a 5 watt solar panel.
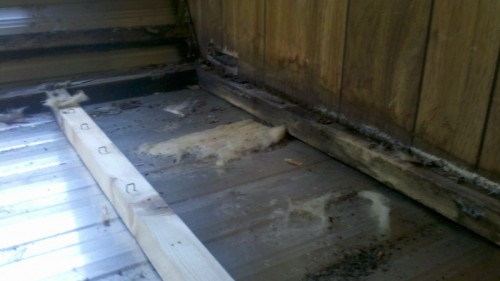
The photo above shows some of the rotten wood after I pulled out the floor board and some insulation. The frame in the truck camper is only 2 x 2 inch pine boards. The floor was 1/4 inch particle board, which broke apart under my knees while looking the stuff over.
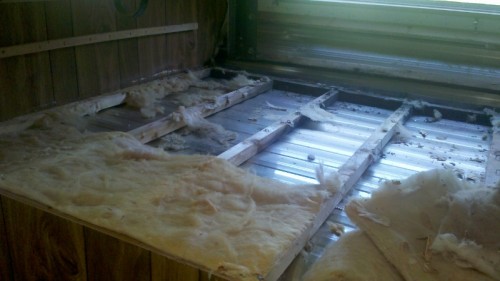
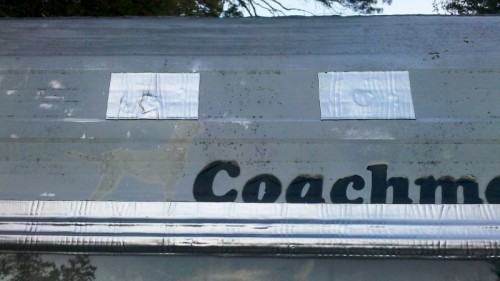
Above you can see the floor board had been removed. I also pulled the back wall out. There was water running down through the window frame and streaming into the back wall. Also the old marker lights on the top front of the camper were missing most of their lenses and were leaking water. So I removed all the lenses and light sockets and filled the holes with spray foam insulation. The next day I covered the holes with tar coated aluminum rv repair tape. It has tar on one side and aluminum on the other. Perfect for a fast and permanent repair.
I also caulked around the window frame. But another rain storm showed me that the frame was leaking around the window itself. So I took my tar coated aluminum repair tape and made a rain guard over it. This worked perfectly well. In the above photo you can see the repaired camper window. You can also see where the old broken marker lights had been. No more leaks on this part of the camper.
Back to my bed repair project. After the wood had dried up I was able to lay down new insulation and wood. I went to the store (wont mention which one) and got advice on what is the best insulation for my project. I was told to use the thickest stuff possible. Now, the frame on this camper is only 2 inches square. I was advised to get 9 1/2 inch thick insulation for its r30 insulation factor. I asked him if he was sure and was told yes, this is what I want. He also mentioned a vapor barrier. Never heard of one before, but I bought some plastic sheeting to place down on the work area first. The vapor barrier keeps wind out of my camper. It is laid down before putting the insulation in. Well, the insulation looked fine. It was compressed into a roll and looked about 2 inches thick in the roll. I figured I can probably manage it then. So I bought it and took it home. After I started to cut the insulation, it started to expand. Now I have cut it and cannot take it back to the store. Now I have a roll of 9 1/2 inch thick insulation on my hands. This stuff expanded to its full size. But the guy told me it was good. So I tried to stuff it into the little 2 inch space.
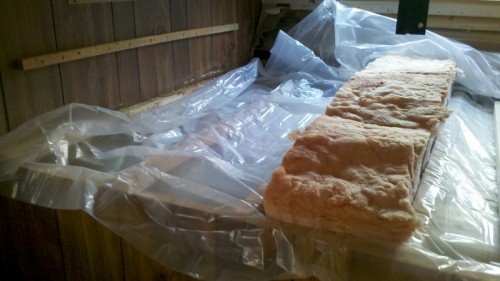
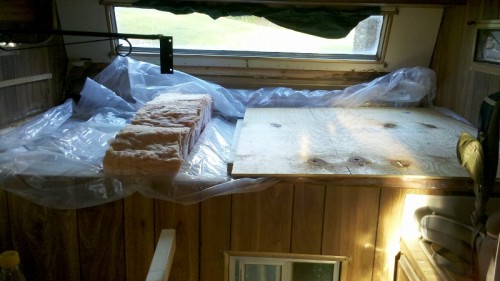
In the photo above you can see the first piece of fat insulation sitting on my new vapor shield. I knew I was in trouble. I was now wishing I had purchased that 3 inch roll of insulation I had been looking at instead of listening to a "professional".
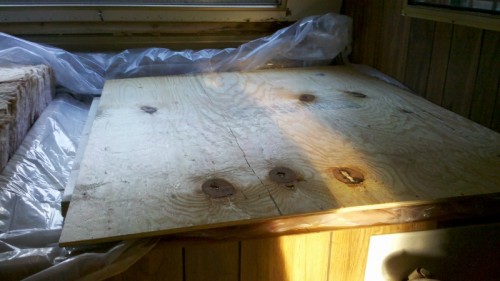
In the photo above you can see that I somehow managed to get one half of the wood down. I got 3/8 inch plywood to replace the weak, flimsy 1/4 inch particle board. I wanted to be sure I wasnt going to need to fix this ever again. And I wanted a bit of strength to it. That particle board was too thin and flexed way too much for my comfort. To press the thick insulation into a 2 inch frame was a job. I put the wood onto the top of the insulation and sat on a corner. I worked my way very slowly and carefully to the back until I was laying down on top of the whole board. Then I was able to nail it into place while keeping a full downward pressure on the board at all times.
Above is a closeup shot of the board after I had it pressed down a bit better. I would never advise anyone to try and cram too much insulation into their camper. It is just too much work. But the guy reassured me that the insulation will retain its full r3o factor even in my camper. I was later told by a carpenter that this is not true. Oh well, it is done now and I have learned a lesson.
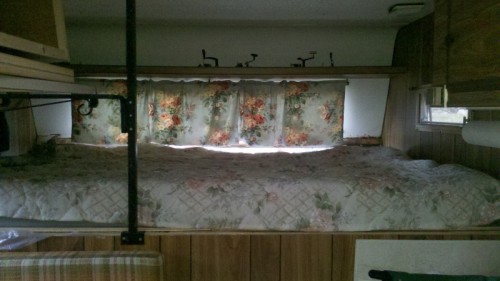
Above you can see the finished above cab bedroom area. It is nice and cozy in there now. I got a free zero pressure hospital mattress that I put in there. When I got the camper it did not even have a mattress at all. Now I can sleep in comfort and feel like I am floating on air. This is a $300 mattress, hardly ever used and has sort of a rubbery outer shell so it washes easily. It has special layers of foam to make you feel absolutely nothing when you lie on it. Oh, what comfort.
While I was fixing up my camper, I caulked every single seam and seal on the whole camper. I caulked around every window, frame, door panel and seam. This was an old 1979 camper after all and it had its share of leaks. I figured while I was at it that I might as well caulk the whole thing. In this way I will catch any possible leak in it and cover any future leaks as well. Campers flex and twist a lot when you are on the road and these seams get a lot of stress on them. The camper seams are filled with a flexible filler substance that squeezes out of the cracks with time. It also gets hard when exposed to the elements too long.
Since the original fridge and heater were taken out, I also caulked and sealed off their access panels for good. They also both had vents to the outside. I sprayed the vents with foam sealer and then sealed off the doors with my aluminum and tar rv repair tape.
This is my survival camper, so a fridge will not be added to this camper. Heat is important, but in a survival situation, you wont have much propane with you. You may have enough for three days at most. So I want to find a heat source that is sustainable for survival. For cooling, I will dig a hole in the ground and use evaporative cooling methods.
In summary, fixing a camper is pretty easy and very cheap. I only paid about $100 total on caulk, wood, insulation and repair tape. Now the whole camper is leak free and mold free.
Check out our DIY Camper Category for more camper repair and upgrade articles.
About the Author
| Troy Reid |

