
Make A Chainsaw Sawbuck From Scrap Materials
We are clearing about an acre and a half on our 56 acre land to make space for our off grid homestead. We are cutting a lot of trees and I needed an easier way to cut them with the chainsaw so I made a sawbuck using all scrap materials.
We are buying this land and trying to become self sufficient and off the grid on a budget. But there was just a small meadow on the entire property. The rest is all wild forest with nothing on three sides but more trees. We need space for our garden and animals. Plus we need to clear the trees which block the path of the sun in order to increase our overall off grid tiny house solar power production.
The trees were only allowing about two hours of full direct sunlight onto the solar panels per day in peak summer hours. A bunch of trees have to be removed in order to allow the sun to reach the solar panels and increase our total usable energy in the tiny house.
Dropping the trees goes quite easy. Cutting the tops of the trees goes very well. But when it comes to cutting the tree trunks laying on the ground it gets to be very hard work cutting them into logs with the chain saw. You have to lift the tree up off the ground in order to cut it with the chainsaw. Or you have to cut most of the way through and then roll the thing over and finish the cut. But with some very heavy trees this is not so easy.
I came up with a very simple sawbuck using all recycled materials that I had on hand. We recently picked up a bunch of 2x6 lumber from a demolition job. This is all good and usable wood that we got for free. It was just waiting for a project.
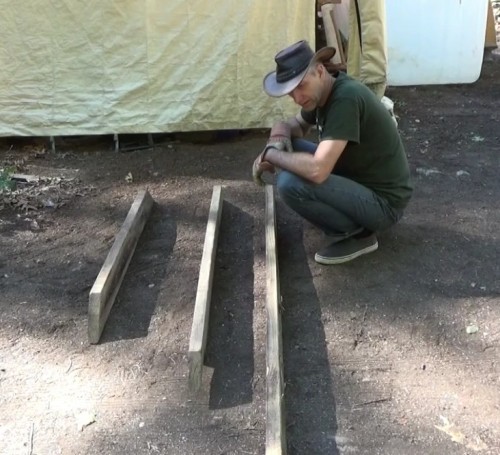
Laying out scrap lumber pieces for the sawbuck
The ends of some of the boards are cut at a steep angle which makes them perfect for the ramp side of the sawbuck. I want to be able to roll the logs up onto the sawbuck with ease.
I cut three of these pieces to the same length at about 32 inches. Next I measured and marked out where the notch will be. The notch will hold the tree in place while I make the cuts with the chain saw. I made the notches 12 inches long and 2 inches deep. This should hold just about anything I am cutting out here on our homestead.
I marked the notches in from the top edge of the ramp about four inches.
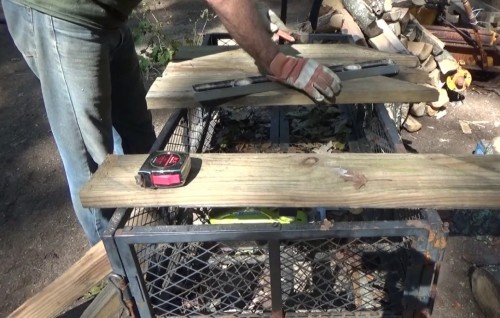
Marking and cutting the notches for the sawbuck
The area was logged out years back and the forest is all relatively new growth. The average tree is about 8 to 16 inches in diameter.
Next I spaced the three pieces for my sawbuck where I felt they would best work for me. I want to have two points of contact with the last piece of wood so that it will sit stable while I cut the last log off. I wanted the sawbuck set up so that I can cut in between the frame without cutting it with the chainsaw. And the spacing is perfect for the size logs that my off grid tiny house wood stove takes. The average wood stove can take about 18 inch logs. My wood stove is small and takes about 12 to 14 inch logs max.
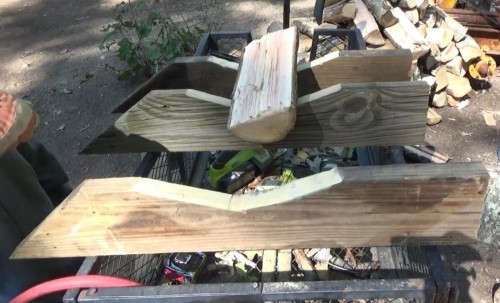
Laying out sawbuck frame parts to fit my wood stove log size
Next I cut three more pieces of 2x6 lumber to use as framing to hold everything together. Two pieces go on the bottom and one on the straight edge.
I am out of screws on the homestead so I fired up the generator and air compressor and got out the framing nailer.
This makes fast work of any job. Just a few seconds and the entire frame for the sawbuck was together and finished.
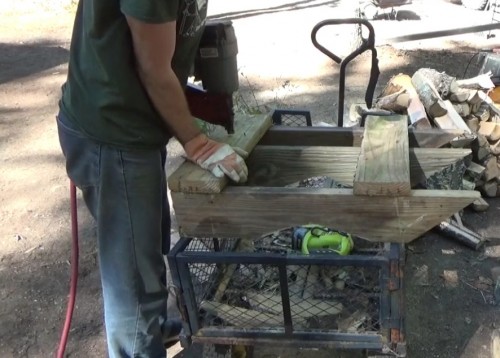
Nailing the sawbuck pieces together
Now it was time to try out my new homemade sawbuck.
I rolled a log onto the saw buck and then cut it into lengths for my tiny house wood stove. The job went very well and easy. This is so much better than trying to cut on the ground with my chain saw.

Trying out my new homemade sawbuck
I got to work and cut the rest of the logs laying around with no problem. What normally took me about an hour or so I had finished in mere minutes. I am loving my new sawbuck.
You can watch the video of the project on YouTube here: Making Sawbuck From Scrap Materials & Cutting Fire wood
While you are over there please subscribe to my channel and follow our daily videos as we strive to become self sufficient and off the grid on a budget.
About the Author
| Troy Reid |


