DIY Passive Heat Exchanger For Wood Stove
Make A Passive Fireplace Heat Exchanger
Free Online Passive Heat Exchanger Plans
A passive fireplace heat exchanger can help you warm up your house, RV or camper faster. With a wood stove heat exchanger in place, you are capturing heat that would otherwise go out the chimney as waste heat. The heat exchanger will collect heat passing through your chimney pipe and radiate that heat into your room. Using a passive heat exchanger saves electricity and cuts down on the cost to make one. With no moving parts, there is also nothing to wear out with time.
Our passive fireplace heat exchanger uses nothing but a roll of common aluminum flashing material and two large hose clamps. The total cost of the heat exchanger was about $12.
How to make a passive wood stove heat exchanger
Go to your local construction supply store and get a roll of aluminum flashing. Ours was about 8 inches wide by 25 feet long. This is enough for two passive fireplace heat exchangers. Pick up two large diameter hose clamps for each heat exchanger you will make. Make sure they will be large enough to go around your metal chimney pipe. You can also use copper flashing if you can afford it. Copper transfers heat better than aluminum, but costs a lot more.
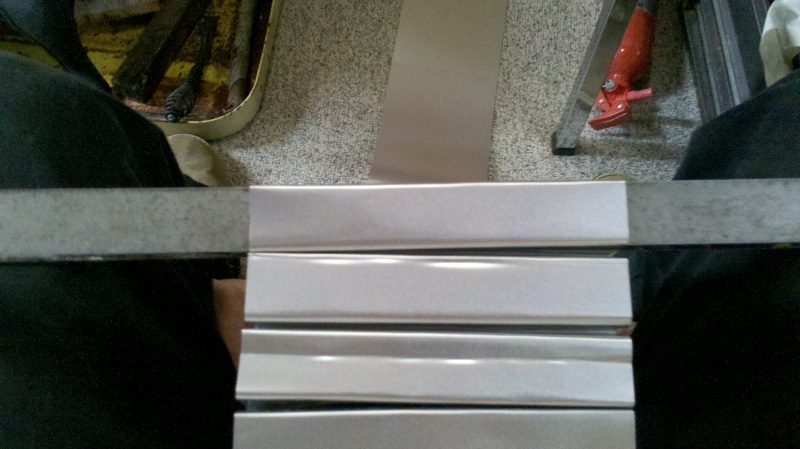
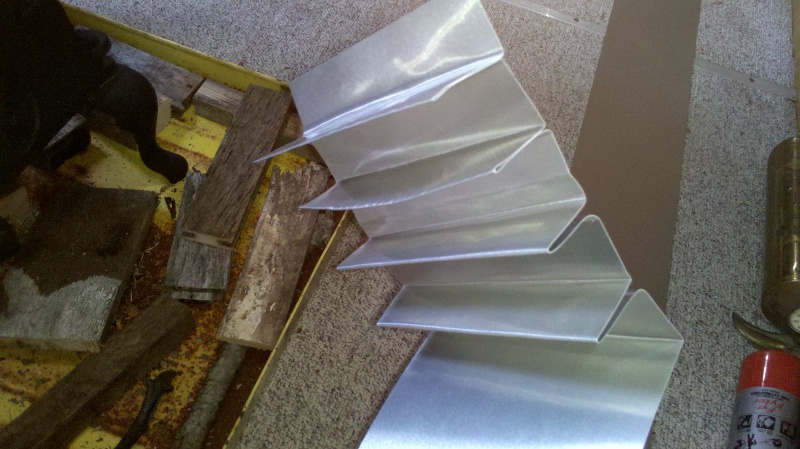
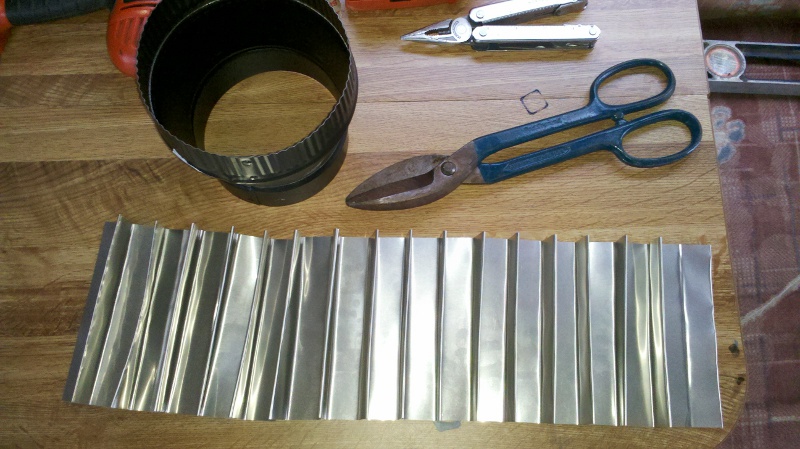
To make your heat exchanger, you will need a water level or similar item that has one edge about an inch wide. The aluminum flashing is rolled out flat on the ground in front of you and you bend the metal over the edge of the level. Anything with an inch wide side can be used to make this heat exchanger. Bend the metal back and forth as seen in the photos below. Keep going until you have enough fins to go completely around your chimney pipe with a little bit of overlap.

Begin bending fins for your heat exchanger

Bend Flashing To Make Fins

Heat Exchanger Fins Half Finished

Homemade Heat Exchanger Fins Are Finished
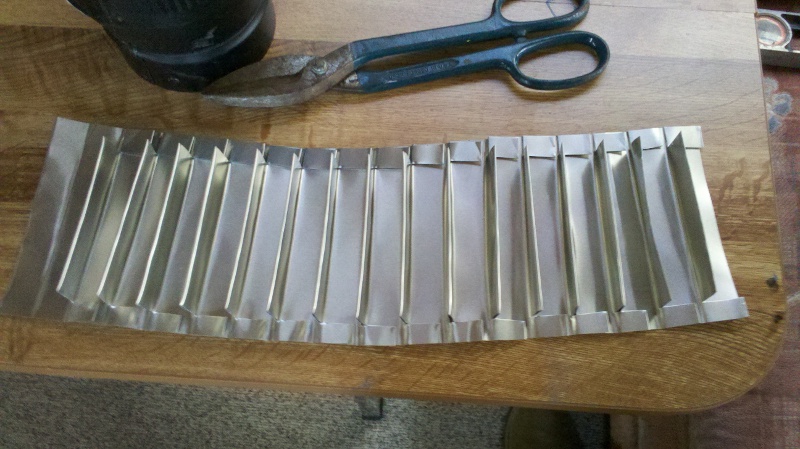
Make sure your heat exchanger fins will go completely around the chimney pipe. When you have enough fins, then you can cut it off the roll of flashing material. Now take a pair of tin snips and cut about an inch deep into each fin. Press the cut piece of fin flat. See the photo below. You can hold your mouse over the image for a larger view. Cut every fin in the same way and press them all down. This gives you an area for the hose clamp to hold the passive heat exchanger to your chimney pipe.

Cut the fins for hose clamp mounting
After you have finished cutting all the fins and pressing the material flat, you can attach it to the chimney pipe. Take your hose clamps and open them all the way so that you can put them around the chimney pipe. You may need some help to get this step done properly. Now take your homemade passive heat exchanger fins and form them around the pipe. If someone holds it in place for you it makes tightening the hose clamps easier. Put one hose clamp on top and one on the bottom of your heat exchanger and tighten them down firmly to the chimney pipe.
Your heat exchanger should look something like the one in the photo below.
Now, the next time you fire up your wood stove, the aluminum fins on your new homemade heat exchanger will collect the heat from the chimney pipe. The fins will naturally radiate the heat into your room, heating it up faster. More heat will be radiated into your room than previously because you are collecting heat that was passing out the chimney into the outside air. Depending on the size of your heat exchanger and how hot the fire is burning, you may be able to feel the hot air flowing off the top of the radiator fins. There will be a hot breeze flowing off the top. Cooler air will be sucked into the heat exchanger from the bottom and the heated air will be radiated off the top of the fins, into your room.
Enjoy the extra heat from your maintenance free, passive heat exchanger.
Variations of this project may include using copper instead of aluminum for more heat transfer. Use wider flashing for more surface area on the chimney pipe. Use larger fins on your heat exchanger to transfer heat faster into the air. Use more than one heat exchanger to increase hot air flow into your room.
Feel free to ask any questions or get help with your project on our
About the Author
| Troy Reid |


