How To Replace Your Vehicle Gas Tank
How To Change Your Gas Tank
Note: working with fuel is flammable and dangerous. Do not work near any flames, electronics or cell phones.
Changing your vehicle's gas tank is relatively easy. There are only two metal straps holding it up onto the vehicle. The following article will guide you through the steps needed to change the gas tank on an average vehicle. Please read everything thoroughly before you begin to make sure you are properly prepared and have all the necessary parts on hand.
First, of course, you need a new gast tank. Next you will need to drive your vehicle up onto some ramps to get the rear end up off the ground. There should be a drain plug on most auto gas tanks which will allow you to drain your gas first. If your vehicle does not have a drain plug, then you may need to siphon off the gas from the tank. Either way, you must drain the old gas tank first or you will struggle getting it out from under the vehicle and may even hurt yourself.

If your vehicle has a fuel pump inside the gas tank then you will need to disconnect that first. It should be located on the top of the fuel tank. You should be able to access the fuel pump wires from inside the vehicle somewhere. Consult a repair manual or a local mechanic if you cannot find your fuel pump. If the fuel pump is located outside the gas tank then your job is a little bit easier. Just remove the fuel lines at the gas tank. For inside fuel pumps, you may not be able to reach the gas lines until you drop the tank, depending on the model of your vehicle.
Next remove the fuel filler neck that connects to the gas tank. This should be a rubber hose with a metal clamp holding it on to the tank near the top.

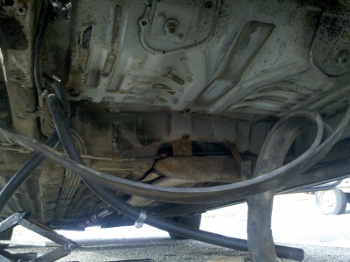
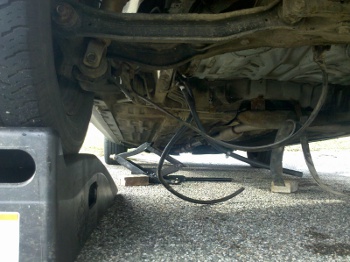
Remove the two straps that hold the gas tank in place underneath your vehicle. There should be four bolts holding the tank up. Two for each strap. It is recommended to replace the gas tank retaining straps as well when you replace a gas tank. You can use some boards and a couple jacks to hold the tank up into place while you work. Place one long board (about the width of the tank) near the front of the tank and hold it in place with one jack. Take another board and jack it into place with the second jack. This will keep the pressure off of the retaining straps while you work.
After removing the retaining strap bolts and the jacks holding the tank in place, you may need to wiggle the tank a bit in order to get it to fall out of place. Sometimes it is wedged in a little bit. It should fall out at any rate. If you have a fuel pump on top of the tank, now is the time to remove the gas lines connecting to it.

You may also have some other lines on top of the tank, depending on your vehicle. There is a main feed line to the engine and a return line.
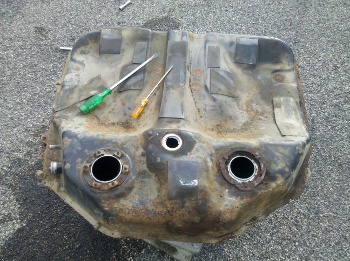
Now, at this time you may need to transfer some parts over from the old gas tank to your new tank. On the tank in the photo below, the fuel pump and regulator are attached to the old gas tank and will be used on the new tank.

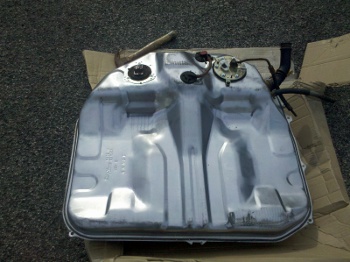
Make sure that you have new gaskets before you begin the job. The new tank should come with gaskets, but may not. Transfer all of the old equipment to the new tank and secure all gaskets and bolts well.

When you are sure everything is in place on the new tank, you can begin to mount the new tank on the vehicle. Do everything in reverse when replacing the new tank. Slide the new gas tank in place underneath the vehicle. Get your jacks and boards ready to hold the tank into place.
Make sure all fuel lines on top of the tank, if any, are in place. Make sure the fuel pump and regulator are in place. Then attach the gas tank retaining straps at the front of the gas tank. Slide the gas tank up into the frame, against the two retaining straps. Use your boards and jacks to hold the tank into place while keeping the straps in position. Carefully and slowly raise the front jack until the gas tank is mostly in place.
Now you can raise the gas tank into the back of the frame. You may end up using your knees under the vehicle to help raise the tank into place. Position a board and the second jack under the rear of the gas tank and carefully raise the jack until the gas tank seats into place. You may need to wiggle the tank a little as you raise the jack to get the tank into place properly. Now you can screw in the remaining screws on the gas tank retaining straps.
Make sure you connect the gas tank filler neck and all of your fuel lines. Connect the fuel pump wires if you took them off. Make sure everything is in place.
Thats it! You are done. Replace the gas you took out and you are on your way.
Check for leaks around all of the hoses and gaskets during the next couple days to make sure nothing comes loose and there are no leaks.
Feel free to ask any questions or get help with your project on our
About the Author
| Troy Reid |


