
Reworking The DIY Hydrogen Booster To Save Gas With Rising Prices At The Pumps
March 2nd, 2012
Well, I ran my car for two years with a homemade hydrogen booster and saw good results. Then it got burnt out with use. Last year I did not drive as much, so the project went on the side burner. Now, with rising gas prices, and me driving a lot more, it is time to build a better H2O booster to increase my vehicle gas mileage.
The previous version was good, and it worked very well. The only problem is that I could not find stainless steel crimp on eye connectors for inside the H2O booster, so there was constant corrosion on the electrical contacts inside the booster. Every couple months I had to take it all apart and rebuild it again with clean connectors. Also, the arcing between the contacts caused excess heat, which melted the plastic booster lid with time. It still works, but I want a new design.
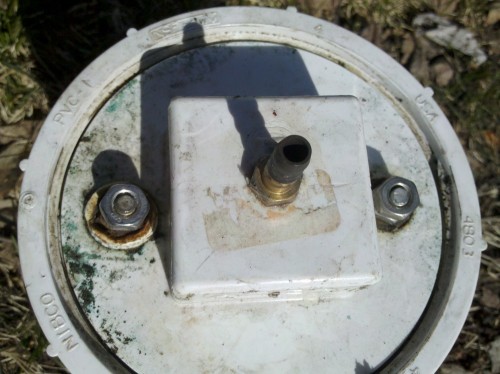
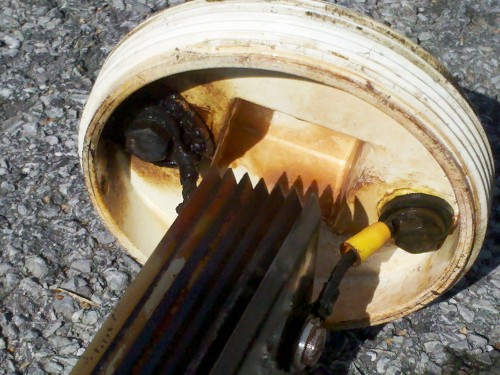
Above you can see the old H2O booster after two years of use. The cheap connectors were arcing inside and caused some problems with the plastic warping a bit. Again, it still worked, but needed constant maintenance. I do believe that the plastic container itself is not a problem if I could get stainless steel connectors.
But now I am planning to use a steel pipe inside another steel pipe. The outside pipe will be capped off with threaded end caps. The inside pipe will have nylon screws threaded into it, spaced evenly around the outsides. The screws will act as spacers when the pipe is inserted into the larger diameter pipe.
I have drawn up an idea here using a graphic editor and some photos.

There will be six nylon screws around the edge of the smaller pipe. Three near the top and three near the bottom, evenly spaced around the pipe. These will be threaded straight through the pipe. The heads will be shaved until the pipe fits snugly into the outside pipe.
The metal rod sticking up from the top of the smaller pipe is a threaded rod that will act as a positive terminal for the device. The inside pipe will be positive. The whole outside of the H2O booster will be connected to the car chassis ground. It will be placed in front of the radiator to cool it and keep the inside water temperatures down. This will help prevent what is called thermal runaway. As the water heats up, it conducts more electricity, which heats up the water more, and so on.
The bottom end cap will be steel and the top will be plastic. The plastic top will allow the positive terminal screw to pass through with no electrical contact to the negative terminal. The screw will be threaded securely into the inside pipe somehow. Or I will get it welded on the inside of the pipe for an even better fit. Then I will dip the weld into some liquid rubber. The stuff you dip tool handles into. After it cures, it should be chemical and heat resistant. This should make a solid, long lasting contact.
The top will also have a hose connector for the gas output.
Fill the whole thing with some water and caustic soda and it should work well. When I get my tools out of storage, I will finish the project. Hopefully very soon. The gas prices are starting to hurt.
View the original Hydrogen Booster Project Here
Questions? Comments? Please visit our Forum and we will be glad to help.
About the Author
| Troy Reid |


